How to Install Roof Shingles correctly is one of the most important steps in creating a durable, weather-resistant roofing system. Roof shingles protect homes from rain, wind, heat, and long-term structural damage. When installed improperly, even high-quality shingles can fail early, leading to leaks, repairs, and costly replacements.
Roof shingle installation is not just about placing materials on a roof. It requires careful planning, proper tools, safety awareness, and step-by-step execution. When done correctly, it prevents leaks, structural damage, and premature roof failure. This guide explains how to install roof shingles safely and efficiently, using professional roofing practices and easy-to-follow instructions.
Understanding Roof Shingles and Their Role
Roof shingles form the outermost layer of a roofing system. Their overlapping design allows water to flow downward while protecting the roof deck beneath. Shingles also help regulate temperature and improve the overall appearance of a home.
Before learning how to install roof shingles, it is important to understand the different types available and where they are commonly used.
Types of Roof Shingles Commonly Used
Choosing the right shingle type affects both installation and long-term performance.
1. 3-Tab Shingles
3-tab shingles are one of the most traditional and widely used roofing materials.
Key Features:
- Flat and uniform appearance
- Lightweight and cost-effective
- Easier to install compared to heavier shingles
- Typically last 15–20 years
3-tab shingles are often used in residential roofing projects where affordability and simplicity are priorities. Because of their lighter weight, proper nailing and alignment are especially important during installation to prevent wind damage.
2. Architectural (Dimensional) Shingles
Architectural shingles are thicker and more durable than 3-tab shingles.
Benefits include:
- Enhanced appearance with layered depth
- Better wind resistance
- Longer lifespan, often 25–30 years
These shingles require careful alignment but offer improved durability when installed correctly.
3. Composite or Asphalt Shingles
Composite shingles combine fiberglass and asphalt materials.
Advantages:
- Strong resistance to weather conditions
- Suitable for most roof slopes
- Widely accepted by building codes
Most modern residential roofs use some form of asphalt-based shingles due to their reliability.
Roofing Safety Guidelines Before Installation
Safety is essential when learning how to install roof shingles, especially when working at height.
Basic Safety Practices
- Use a stable ladder placed on solid ground
- Wear slip-resistant roofing shoes
- Use safety harnesses on steep roofs
- Wear gloves and eye protection
- Avoid working in wet or windy conditions
Professional contractors, including United Developers, follow strict safety standards to reduce risks and ensure smooth installation.
Tools and Materials Required for Roof Shingle Installation
Having the right tools ready improves efficiency and reduces installation errors.
Essential Tools and Materials
| Category | Items Needed |
|---|---|
| Tools | Roofing hammer or nail gun, utility knife, chalk line, tape measure |
| Safety Gear | Gloves, safety harness, roofing shoes, safety glasses |
| Materials | Asphalt shingles, roofing nails, underlayment, drip edge, flashing |
Preparing everything in advance helps avoid interruptions during installation.
Step 1 – Inspecting and Preparing the Roof Deck
A solid foundation is essential when learning how to install roof shingles correctly.
Roof Deck Inspection
- Check for rotted, cracked, or weak plywood
- Replace damaged sections before installation
- Ensure the surface is dry, clean, and flat
Skipping this step can lead to shingle failure and moisture problems later.
Step 2 – Installing the Drip Edge
The drip edge is installed along the roof edges to guide water into the gutters and protect the roof deck.
Installation Tips
- Install drip edge along eaves first, then rake edges
- Secure it with roofing nails every 10–12 inches
- Ensure it extends slightly beyond the roof edge
This step improves water drainage and extends roof lifespan.
Step 3 – Laying the Roof Underlayment
Underlayment acts as a protective barrier between shingles and the roof deck.
Why Underlayment Is Important
- Adds extra waterproofing
- Protects against wind-driven rain
- Improves roof durability
Roll the underlayment horizontally, starting from the bottom of the roof and overlapping each layer by at least 4 inches. Secure it with roofing nails or staples as recommended.
Step 4 – Installing Starter Shingles
Starter shingles are placed along the roof edge to seal the first row and prevent wind uplift.
Best Practices
- Install starter shingles with adhesive strip facing up
- Align them evenly along the eaves
- Overhang slightly to allow proper water runoff
This step is often overlooked but plays a major role in roof performance.
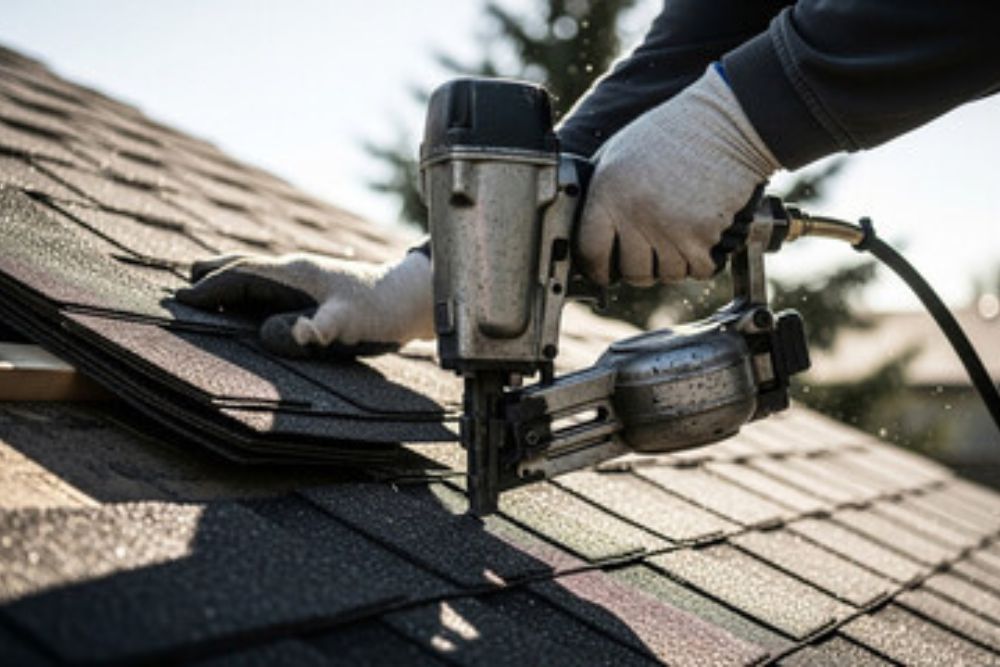
Step 5 – How to Install Roof Shingles Row by Row
Now comes the core process of how to install roof shingles efficiently.
Proper Installation Technique
- Start at the bottom corner of the roof
- Align the first full shingle above the starter strip
- Nail each shingle according to manufacturer guidelines
- Use a chalk line to keep rows straight
- Stagger shingles to avoid vertical seams
Correct nail placement is critical. Nails should be driven straight, flush with the shingle surface not too deep or too loose.
Step 6 – Cutting and Fitting Shingles Around Obstacles
Roofs often have vents, chimneys, or skylights that require precise cutting.
Tips for Accuracy
- Measure carefully before cutting
- Use flashing around penetrations
- Seal edges with roofing cement
Professional installers take extra care in these areas to prevent leaks.
Step 7 – Installing Roof Flashing
Flashing protects vulnerable roof areas where water penetration is most likely.
Areas That Need Flashing
- Around chimneys
- Along roof valleys
- Near vents and pipes
Flashing should be installed under shingles and sealed properly. This step significantly improves water resistance.
Step 8 – Installing Ridge Cap Shingles
Ridge cap shingles are placed at the peak of the roof to seal the top.
Installation Process
- Cut standard shingles into ridge caps if needed
- Install them overlapping each other
- Nail securely on both sides
Ridge caps allow proper ventilation while protecting the roof ridge.
Step 9 – Final Inspection and Cleanup
After completing the installation, conduct a thorough inspection.
What to Check
- Straight shingle lines
- Proper nail placement
- Secure flashing
- No exposed nails
Clean up debris, leftover nails, and materials from the site to maintain safety and professionalism.
Final Thoughts
Understanding how to install roof shingles safely and efficiently requires careful planning, attention to detail, and a strong focus on safety. Each step from roof inspection to final cleanup plays a vital role in creating a durable and weather-resistant roofing system.
By following proper installation methods, using the right tools, and avoiding common mistakes, you can achieve professional-level results. Whether you are improving your knowledge or overseeing a roofing project, this guide provides a clear and reliable foundation for successful roof shingle installation.
READY TO TRANSFORM YOUR SPACE?
Discover top-rated construction, remodeling, and renovation services tailored to your needs.
Trusted by 50+ businesses across Maryland & Virginia.