How to Install a Windows is a common question for homeowners who want better comfort, fewer drafts, and a cleaner exterior look. A window may seem simple, but proper installation depends on accurate measuring, clean framing, flashing, insulation, and exterior sealing.
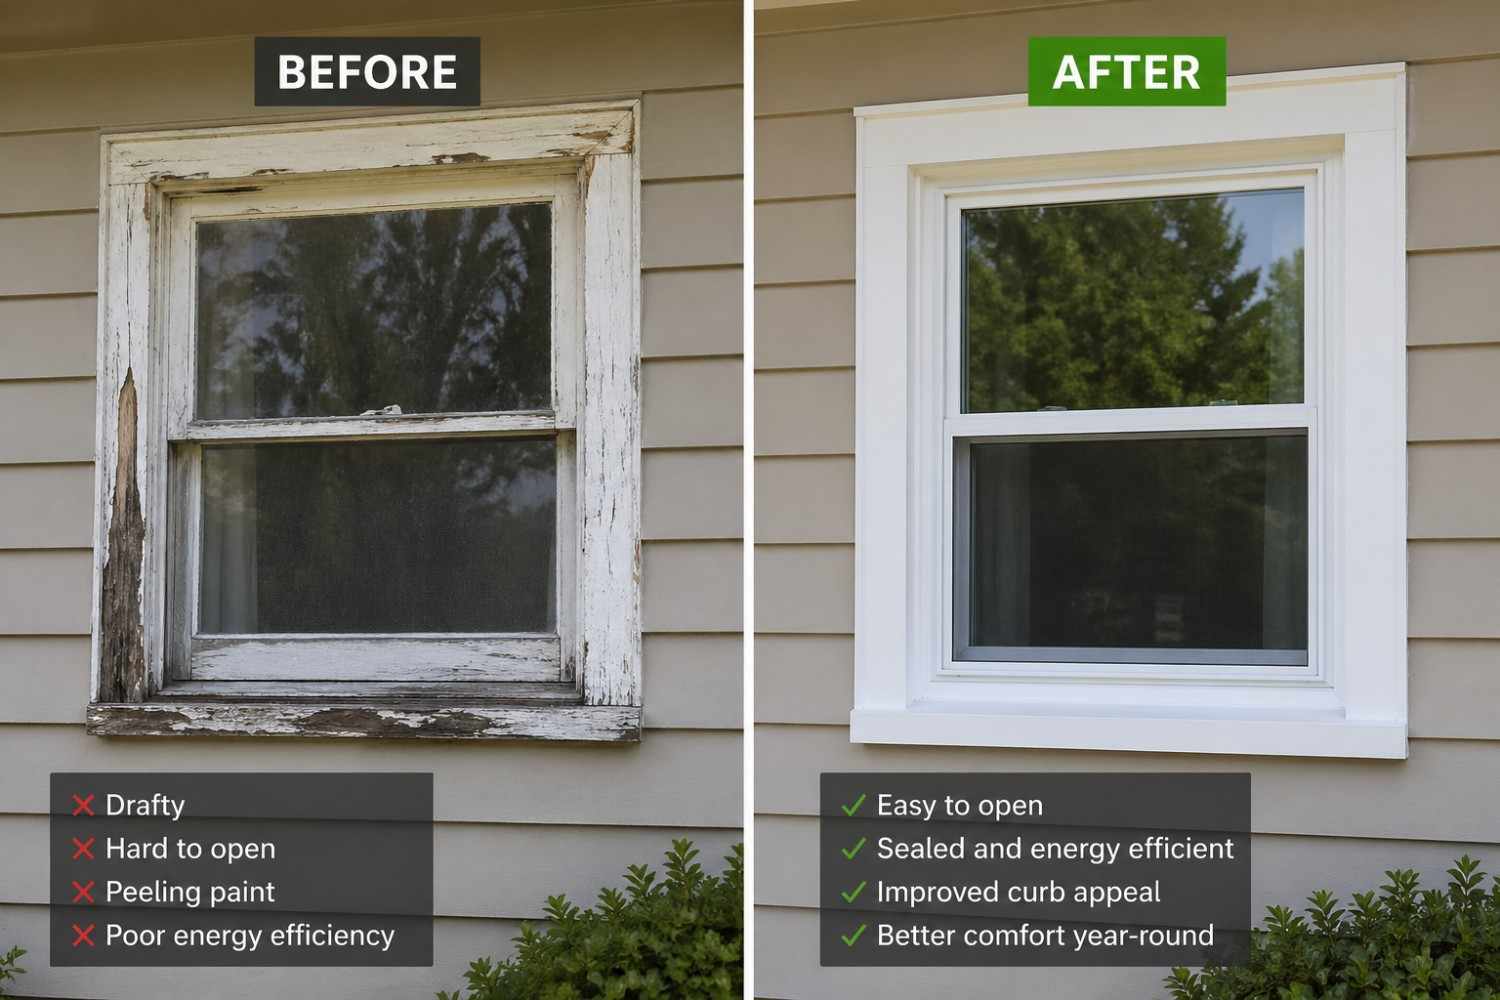
If a window is installed poorly, it can cause air leaks, water damage, mold growth, hard-to-open sashes, and higher energy bills. This guide explains How to Install Windows step by step, what tools you need, what mistakes to avoid, and when hiring a professional is the smarter choice.
Whether you want to understand the process before starting a DIY project or before hiring a contractor, this guide will help you make a better decision.
Why Proper Window Installation Matters
Before learning How to Install Windows, you need to understand why the process matters. A window is not just glass inside a frame. It is part of your home’s exterior protection system.
A properly installed window helps:
- Reduce drafts
- Improve energy efficiency
- Protect against moisture
- Prevent frame damage
- Improve curb appeal
- Make the window easier to open and close
For homes in Maryland and Virginia, proper window flashing and sealing are especially important because rain, humidity, and seasonal temperature changes can quickly expose weak installation work.
Tools Needed
Before you start, get everything ready. Stopping to look for tools in the middle of the job wastes time and leads to mistakes.
Here’s what you’ll need:
Tools:

- Tape measure
- Pry bar
- Reciprocating saw (or handsaw)
- Hammer or nail gun
- 4-foot level
- Utility knife
- Caulking gun
- Drill with bits
- Safety glasses and work gloves
Quick tip: Always measure the rough opening, the actual hole in your wall before ordering a window. Your new window should be about ½ inch smaller on each side. That small gap gives you room to level it perfectly.
How to Install Window — Step-by-Step
Let’s walk through exactly how to install windows, one step at a time. Take your time with each step, rushing is the number one reason installations go wrong.
Step 1: Measure the Window Opening
The first step in How to Install Windows is measuring the opening correctly.
Measure the width at the top, middle, and bottom. Then measure the height on the left, center, and right side. Use the smallest measurement when ordering your replacement window.
The new window should have enough space around it for leveling, shimming, and insulation. If the window is too tight, it may not sit properly. If it is too small, sealing becomes harder.
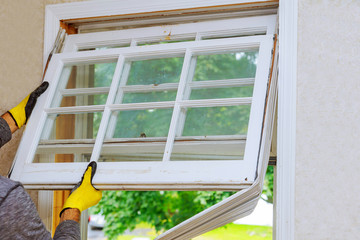
Step 2: Remove the Old Window
Carefully remove the interior trim using a utility knife and pry bar. Cut through old caulk or paint so the trim does not break. Then remove the old window sash, frame, screws, or nails.
If the window has a nailing flange, you may need to cut old fasteners with a reciprocating saw. Work slowly so you do not damage the surrounding siding or wall framing.
This part of How to Install Windows requires patience. Rushing removal can damage the opening and create extra work.
Step 3: Inspect the Rough Opening
After removing the old window, inspect the rough opening. This is the framed opening where the new window will sit.
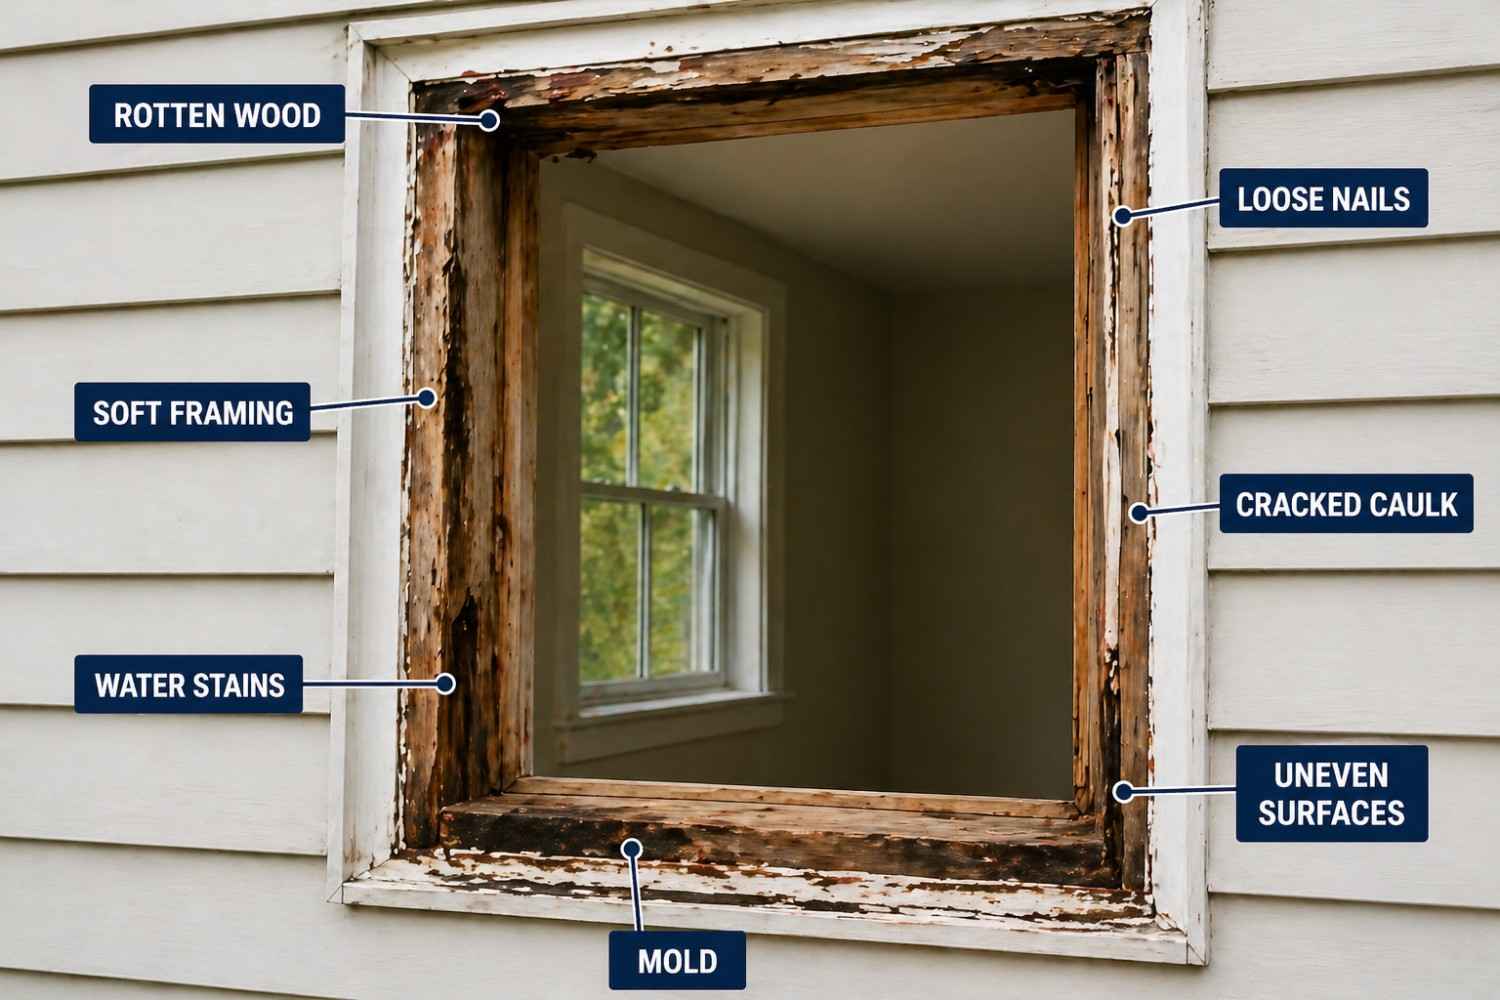
Look for:
- Rotten wood
- Soft framing
- Water stains
- Mold
- Loose nails
- Cracked caulk
- Uneven surfaces
If the framing is damaged, fix it before installing the new window. Installing a new window over rotten wood is a bad shortcut. It may look fine at first, but it can lead to leaks and structural problems later.
Step 4: Dry Fit the New Window
Before applying caulk or fastening the window, place the new window into the opening to check the fit.
The window should sit evenly with small gaps around the frame. These gaps allow room for shims, insulation, and proper alignment. Use a level to check that the window sits straight. If the window feels too tight, crooked, or uneven, adjust the opening before moving forward. Do not force the window into place. A forced fit can create frame pressure and cause the sash to stick later.
Step 5: Apply Sill Flashing
Sill flashing is one of the most important parts of How to Install Windows because it protects the bottom of the opening from water intrusion.
Apply flashing tape across the sill and extend it slightly up both sides of the rough opening. Press it firmly so there are no wrinkles, gaps, or loose edges.
The goal is to create a waterproof base under the window. If water ever gets behind the window, the flashing helps guide it away instead of letting it soak into the framing.
Step 6: Set the Window in Place
Apply exterior-grade caulk around the sides and top of the opening, following the window manufacturer’s instructions. Avoid sealing the bottom in a way that blocks drainage.
Carefully lift the window into the opening and position it evenly inside the frame. For larger windows, use a helper so the unit stays steady and does not shift.
Center the window in the opening, leaving even gaps on both sides. Use shims lightly to hold it in place before final leveling and fastening.
Step 7: Secure and Level the Window
Getting your window perfectly level is the most important part of how to install windows correctly. Even being slightly off will make it hard to open, close, and seal properly.
Here’s what to do:
- Place your level across the bottom of the window
- Tap shims under the lower corners until the bubble is centered
- Check both sides, the window should be straight up and down (this is called “plumb”)
- Once it’s level and plumb, drive screws or nails through the nailing flange into the wall framing
After securing it, open and close the window a few times. It should glide smoothly. If it sticks anywhere, loosen the screws slightly, adjust your shims, and tighten everything again.
Step 8: Apply Side and Top Flashing
After the window is secured, apply flashing tape along both sides of the window flange. Then apply the top flashing piece last.
The flashing should overlap in the correct direction so water sheds down and away from the window. Side flashing should overlap the sill flashing, and the top flashing should overlap the side pieces.
Do not leave gaps, wrinkles, or exposed edges. Poor flashing is one of the main reasons window installations fail.
Step 9: Seal the Exterior
Apply exterior-grade caulk around the outside edges where the window meets the siding or trim. Keep the caulk line smooth and clean. Do not cover weep holes or drainage paths. These small openings allow water to escape.
This is a critical part of window installation because even a perfectly level window can fail if it is not sealed correctly.
Step 10: Finish the Interior
Reinstall the interior trim or replace it if needed. Fill nail holes, touch up paint, and clean the glass.
Before calling the job complete, check:
- The window opens smoothly
- The lock works properly
- There are no visible gaps
- There are no drafts
- The exterior seal is clean
- The window sits straight
If all of these are correct, the window installation is complete.
Common Window Installation Mistakes
Even if you understand How to Install Windows, small mistakes can create big problems.
| Mistake | Why It Is a Problem |
|---|---|
| Wrong measurements | The window may not fit correctly |
| Skipping flashing tape | Water can leak behind the wall |
| Using regular spray foam | It can bend the window frame |
| Overtightening screws | The sash may not open smoothly |
| Blocking weep holes | Water gets trapped |
| Ignoring damaged framing | Rot and leaks continue behind the window |
These mistakes are not minor. They can shorten the life of the window and damage the wall around it.
DIY vs Professional Window Installation
DIY window installation may work if you are replacing one standard-size window and the frame is in good condition.
Professional window installation is better when:
- The frame has rot or water damage
- The window is large or heavy
- The opening needs adjustment
- The siding or trim must be repaired
- You are replacing multiple windows
- You are unsure about flashing or sealing
UD Roofing provides professional window installation and replacement services for homeowners in Maryland and Virginia. If your project involves exterior sealing, damaged framing, or multiple windows, hiring an experienced team is the safer choice.
Can I install a window myself?
Yes, you can install a window yourself if the opening is in good condition and you have basic carpentry skills. If you find rot, water damage, or uneven framing, it is better to call a professional.
What is the most important part of window installation?
The most important parts are accurate measuring, proper flashing, and correct sealing. A window can look fine from the outside but still fail if water gets behind the frame.
Is professional window installation worth it?
Yes, especially if the opening has damage, the window is large, or the exterior sealing needs careful work. Professional installation helps reduce the risk of leaks, drafts, and long-term frame problems.
Should I caulk around the entire window?
You should caulk around the recommended exterior edges, but do not block weep holes or drainage paths. Windows need proper drainage to prevent trapped moisture.
Final Thoughts
Learning How to Install Windows helps you understand the process and avoid expensive mistakes. The most important steps are accurate measuring, clean preparation, proper flashing, careful leveling, secure fastening, insulation, and exterior sealing.
If the job is simple and you have the right tools, DIY may be possible. But if the frame is damaged, the opening is uneven, or the exterior needs careful waterproofing, professional installation is the smarter option.
A window should not just look good. It should protect your home, reduce drafts, improve energy efficiency, and perform well for years. That only happens when the installation is done correctly from the start.
Ready to Transform Your Space?
Contact Us Today!
Get in touch with our team today for trusted service.
Trusted by 50+ businesses across Maryland & Virginia.